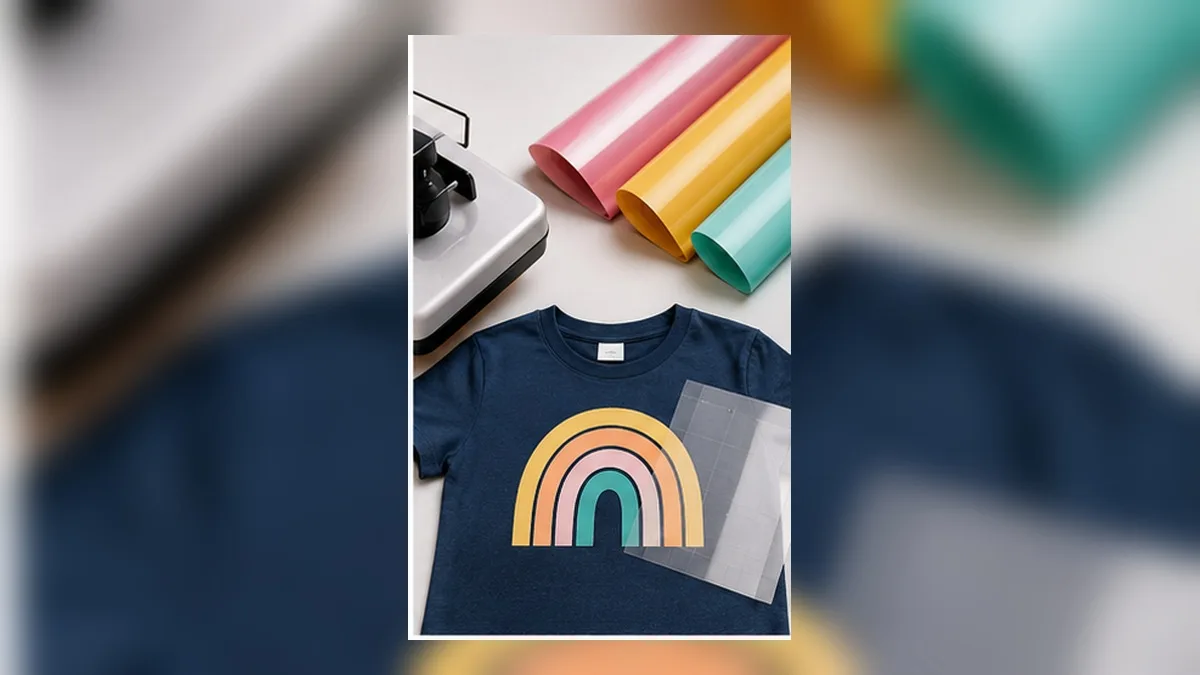
The rule that covers 90% of layered HTV
Press the biggest, bottom-most piece first; add smaller pieces on top; save the finest detail for last.
Almost every layering question is a variation of that. The reason is simple: each pass adds heat to everything underneath it. The layer that goes down first will be pressed the most times, so it should be the one that can take it — usually the largest, plainest piece.
Working out your own order in four steps
- Draw the design as a stack. Which colour is visually behind the others? That’s layer 1.
- Check for materials that can’t be layered over (see the table below). If one exists, it must be the top layer, regardless of the visual stack.
- Count the passes. Layer 1 will be pressed once for every layer above it. If that’s four or more, use a lower temperature and shorter presses for the intermediate steps.
- Finish with a firm final press with the cover sheet on.
The layering-order cheat sheet
| Situation | Order |
|---|---|
| Standard colours, simple stack | Largest / bottom-most first, smallest last |
| Dark colour under light colour | Dark first — light HTV is thinner and can shadow |
| Glitter involved | Glitter last, always |
| Flocked involved | Flocked last |
| Holographic / metallic / foil | Last, or check the brand’s guidance |
| Stretch / performance material | Last, and reduce heat for anything under it |
| Printable HTV | Usually a base layer; don’t stack over it |
| Fine detail or thin lettering | Last, so it’s pressed only once |
What can go under what
This is where projects fail permanently rather than cosmetically.
Safe as a base layer: standard smooth HTV in most brands. It’s designed to take repeated heat.
Never as a base layer: glitter, flocked, holographic, foil, and most specialty finishes. Their surfaces are textured or coated, and the next layer either won’t bond or will crush the texture. Pressing over glitter also tends to flatten and dull it.
Depends on the brand: stretch materials, puff HTV, and printable HTV. Check the manufacturer’s own layering chart — this genuinely varies, and getting it wrong ruins the shirt rather than the design.
Never mix a low-temperature material under a high-temperature one. The lower-temperature layer will be pressed above its limit every time you press the layer above it.
Time and temperature for layered work
Exact numbers come from the manufacturer of the specific material — treat everything here as a pattern, not a spec.
The pattern that matters:
- Intermediate layers get a short “tack” press — just long enough for the carrier to release, typically a few seconds.
- The final layer gets the full press at the material’s stated time and temperature.
- Every intermediate press adds to the total heat load on layer 1. Four layers of full-length presses will overcook the bottom layer.
A rough template for a three-layer design:
| Step | Press |
|---|---|
| Layer 1 | Tack press, short |
| Layer 2 | Tack press, short |
| Layer 3 (top) | Full press at stated time |
| Finish | Optional short press with cover sheet |
Pre-press the garment for a few seconds before layer 1. It removes moisture and wrinkles, and it’s the cheapest reliability improvement available.
Alignment: the part that’s actually a data problem
Most misalignment isn’t a pressing problem — it’s a file problem. If the layers are generated separately and positioned by eye, they will drift.
Two things fix it:
1. Cut all layers from one aligned file. Design the whole stack together, then export each colour as its own cut without ever moving anything. If the layers came from the same coordinate space, they line up by construction.
2. Keep the carrier sheet big. Don’t trim the clear carrier tight to the design. A generous carrier gives you registration edges to align against, and lets you see through to the layer underneath.
A third trick for complex stacks: make the bottom layer slightly larger where it will be covered — an extra 0.5 mm of overlap under an upper layer is invisible and absorbs small alignment errors. This is the HTV equivalent of bleed.
The same “generate the whole stack at once” idea is what makes layered lettering practical — see How to Make Layered Vinyl Text Without Buying Layered SVGs.
Mirroring, and the mistake everyone makes once
Heat-transfer vinyl is cut face down, so every layer must be mirrored before cutting.
The failure mode with layered designs is mirroring some layers and not others. Then the stack won’t assemble at all, and you won’t know why until you’ve cut everything.
Mirror the whole design once, then split it into layers — not the other way round.
Design decisions that make layering easier
- Fewer layers. Three well-chosen colours usually read better than six, and press far more reliably.
- Avoid hairline gaps between colours. A 0.2 mm gap becomes a visible line of shirt colour after the first wash. Overlap slightly instead.
- Keep fine detail on the top layer, where it’s pressed once.
- Watch the total thickness. Four layers of HTV on one spot is stiff, cracks earlier, and feels unpleasant. If a design needs that many, consider printing it instead.
Thin strokes are the other common cause of layered-HTV failure — see Best Fonts for Vinyl Decals.
Choosing your press
The heat source changes what’s achievable, and it’s worth being honest about the differences.
| Press type | Even pressure | Even heat | Good for |
|---|---|---|---|
| Clamshell / swing-away press | ✅ | ✅ | Flat garments; the reliable default |
| Small portable press | ✅ Within its footprint | ✅ | Small designs, pockets, kids’ shirts |
| Household iron | ❌ Uneven | ❌ Uneven | Occasional single-layer work only |
| Tumbler / mug press | ✅ On curves | ✅ | Curved hard surfaces |
| Heat-shrink wrap + oven | ✅ Conforming | ✅ | Tumblers, odd shapes |
Layered work and household irons are a bad combination. Layering depends on consistent, repeatable heat and pressure, and an iron gives neither. If layering is going to be a regular thing, a press is the single upgrade that changes results most.
Pressure matters as much as temperature. Too little and the adhesive never fully activates; too much and you emboss the garment and squash the layers. Medium-firm — you should feel resistance closing the press, but not have to force it.
Preparing the garment
- Pre-wash new garments without fabric softener. Softener coats fibres and interferes with adhesion.
- Pre-press for 3–5 seconds to drive out moisture and flatten wrinkles. A wrinkle under layer 1 becomes permanent.
- Check the fabric. Polyester and poly blends need lower temperatures than cotton, and some dyes migrate under heat — which shows up as a pink haze through white vinyl. If you’re using a dark polyester, look for a low-temperature or blocking material.
- Watch for seams and zips. They stop the platen making even contact. A pressing pillow lifts the design area above them.
Placement that looks professional
- Adult tee, centre chest: roughly 3 in below the collar seam, centred on the shirt width
- Left chest logo: roughly 4 in wide, positioned about 7 in down and 4 in in from the shoulder seam
- Youth sizes: scale down and move up — proportionally, kids’ designs sit higher
- Fold to find the centre. Folding the shirt in half vertically and pressing a crease gives you a centre line more reliable than eyeballing.
Measure once with a ruler and note the numbers for each size you use regularly. It’s much faster than judging every time, and far more consistent across a batch.
Troubleshooting layered HTV
| Symptom | Likely cause | Fix |
|---|---|---|
| Edges of the top layer lift after washing | Not enough time or pressure on the final press | Increase final press time; check pressure |
| Bottom layer looks shiny or scorched | Too many full-length presses over it | Use short tack presses for intermediates |
| Layers won’t stick to each other | Specialty material used as a base | Move glitter/flocked/holographic to the top |
| Design cracks after a few washes | Too many layers, or overheating | Reduce layer count; check temperature |
| A faint outline of the carrier sheet shows | Pressed too long, or press too hot | Reduce time; use a cover sheet |
| Colour bleeding through white vinyl | Dye migration from the garment | Lower temperature, or use a blocking material |
| Layers misaligned | Positioned separately rather than cut from one file | Cut all layers from one aligned design |
| Vinyl peels with the carrier | Not enough heat, or peeling at the wrong temperature | Check whether the material is hot-peel or cold-peel |
Hot peel vs cold peel is worth knowing per material: peeling a cold-peel material while hot lifts the design straight off. It’s written on the roll or the manufacturer’s chart.
Care instructions to pass on
If you’re selling, include these — it reduces returns and it’s what a professional shop does.
- Wait 24 hours before the first wash
- Turn inside out to wash
- Cold or warm water, gentle cycle
- No bleach, no fabric softener
- Tumble dry low, or hang dry — high heat is what kills layered designs
- Don’t iron directly on the design. If pressing is needed, use a cover sheet and go around it
A small printed card with these on it costs almost nothing and noticeably reduces “it peeled” messages.
Frequently asked questions
Q. Can I put glitter HTV under another layer?
As a rule, no. Glitter is textured and coated; the next layer won’t bond reliably and the glitter itself gets crushed. Put it on top.
Q. How many layers is too many?
Three is comfortable, four is the practical ceiling for most materials, and beyond that the result is stiff and prone to cracking. Check what your material’s maker says.
Q. Do I press between every layer?
A short tack press between layers, and one full press at the end. Full presses at every stage overcook the bottom layer.
Q. My layers don’t line up. What went wrong?
Almost always that the layers were positioned separately. Design the stack as one file, cut each colour without moving anything, and keep the carrier sheets large.
Q. Should I mirror every layer?
Yes — but mirror the complete design first, then separate it into layers. Mirroring layer by layer is how half a design ends up backwards.
Q. Light colour over dark, or dark over light?
Put the dark down first. Light HTV is generally thinner and can pick up a shadow from a dark layer showing through.
Summary
- Biggest and bottom-most first, finest detail last covers most designs
- Glitter, flocked, holographic and foil go last — they’re not base layers
- Tack press intermediates, full press the top layer to protect layer 1 from repeated heat
- Alignment is a file problem: cut every layer from one design without moving anything
- Mirror the whole design once, then split it into layers
Get the order and the file right and layered HTV becomes routine rather than a gamble.
→ Build an aligned multi-layer design (no sign-up · export free for a limited time)
Material times and temperatures vary by manufacturer and by garment — always follow the specific product’s instructions. Cricut, Design Space and Silhouette are trademarks of their respective owners. DecoTecoPop is an independent tool and is not affiliated with, endorsed by, or sponsored by any cutting-machine or vinyl manufacturer.