The short answer
To draw 3D letters by hand:
- Draw thick letters (block letters or outlined bubble letters, not single lines).
- Pick one depth direction, such as down and to the right.
- From each outer corner, draw a short line in that direction, all the same length.
- Join the ends of those lines, erase what hides behind the front, and shade the sides darker than the front.
The rule that matters most: every letter uses the same direction and the same length. One letter going the wrong way flattens the whole word.
This guide is about drawing with a pencil. If you want a 3D text image for a logo or thumbnail instead, see how to make 3D text as a transparent PNG or SVG, or jump straight to the 3D Text Generator.
Step by step
1. Draw thick letters
3D needs a front face, and a single pencil line has none. So start with letters that have thickness:
- Block letters: straight, thick strokes with square corners. The easiest to put in 3D.
- Outlined letters: write the word normally, then trace around the outside of every stroke at an even distance.
Leave extra space between letters. The depth makes each letter take up more room.
2. Pick one depth direction
Draw a small arrow in the corner of the page, for example “down-right, 1/4 inch”. That arrow is your rule for every letter.
- Down-right or down-left: the letters look like they stand on a table. Easiest to read.
- Straight down: heavy and solid. Good for signs and headings.
- Upward: the letters seem to tip backward. Try it once you have the basics.
3. Add equal lines from the corners
From each corner, draw a short line in the arrow’s direction. A ruler keeps every line the same length, and that alone makes the letters look clean.
Only draw lines from corners that sit on the outside of the front face. A line that would cross over the front face will be hidden, so skip it.
4. Connect, erase, shade
Join the ends of the short lines with the same shape as the letter. That is the back edge of the letter.
- Erase any line that sits behind the front face.
- The area between the front and the back edge is the side. Color it darker than the front.
Your eye reads the light-to-dark contrast as depth. If the front and the side are similar colors, the letters look flat. Finish by tracing the outermost edge with a dark pen so the shape reads from a distance.
Which way should the shadow go?
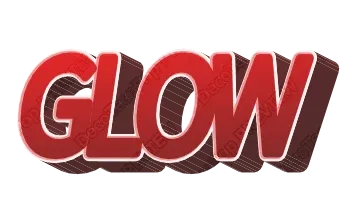
Imagine where the light comes from, and put the depth on the opposite side. Light from the top left means the sides fall down and to the right, in shadow.
| Depth direction | How it looks | Good for |
|---|---|---|
| Down-right / down-left | Standing on a surface | Names, titles, posters |
| Straight down | Heavy, solid | Signs, headings |
| Sideways | Lit from the side | Wide logos |
| Up | Tipping backward | Once you’re comfortable |
For extra realism, use two shades on the sides: the faces pointing down are darkest, the faces pointing sideways a little lighter.
Round letters: O, S, C, G
Curves have no corners, so “draw from each corner” needs one change.
- Start from the outermost point of the curve. Look along your depth direction and find where the curve turns back. With down-right depth, that is the lower-right bulge of the
O. That point is where the side begins. - Copy the front curve to make the back curve, shifted by the depth. Think of tracing the front curve again, a little lower and to the right.
- Keep the depth shorter on round letters. Deep sides fill in the hole of an
O,aore.
Common mistakes
| Mistake | What happens | Fix |
|---|---|---|
| Depth goes a different way on each letter | The word looks flat | Draw the arrow first and follow it on every letter |
| Depth lines of different lengths | The letters look warped | Measure them with a ruler |
| Deep sides on thin letters | The side swallows the letter | Thicken the letters first, or shorten the depth |
| Front and side in similar colors | No depth | Light front, dark side |
| Hidden lines left in | The letters look see-through | Erase lines behind the front face |
Making 3D letters on your phone
When you need 3D text for a poster, a sign or a thumbnail rather than a sketchbook, a phone is faster.
- Type your word into the 3D Text Generator. Up to 24 characters.
- Pick a 3D style: block, comic, glossy, woodgrain and more, all shown with your word.
- Adjust it in the editor: tap Customize more, then change the depth, the angle of the sides and the side color, which is the same arrow-and-shading idea as drawing by hand. There is also 3D rotation to tilt the whole word.
- Download a transparent PNG for photos and posts, an SVG that stays sharp at any size, or a print-ready PDF.
You can also print your word in 3D and trace it, or keep it next to your paper as a guide while you draw.
FAQ
How do you draw 3D letters step by step?
Draw thick letters first (block letters or outlined bubble letters). Choose one depth direction, such as down and to the right. From each outer corner, draw a short line in that direction, all the same length. Join the ends of those lines in the shape of the letter, erase lines hidden behind the front face, and shade the sides darker than the front.
Which way should the 3D side of the letters go?
Any direction works as long as every letter uses the same direction and the same length. Down-right or down-left is the easiest to read, because the letters look like they are standing on a surface.
How do you draw 3D on round letters like O, S and C?
Curves have no corners, so start the depth lines from the outermost point of each curve: the spot where the curve turns back, seen from the depth direction. Then draw the back curve as a copy of the front curve, shifted by the depth.
Can I make 3D letters on my phone instead?
Yes. Type your word into the free 3D Text Generator, pick a 3D style, and download a transparent PNG or SVG. In the editor you can change the depth, the angle of the sides and the side color.
Want them round and inflated instead? See how to draw puffy letters. For readable 3D titles on screen, read thumbnail text that reads on a phone.